> ## Documentation Index
> Fetch the complete documentation index at: https://docs.rynopay.io/llms.txt
> Use this file to discover all available pages before exploring further.
# Crypto Beneficiaries
> Add and save a crypto wallet as a payout destination.
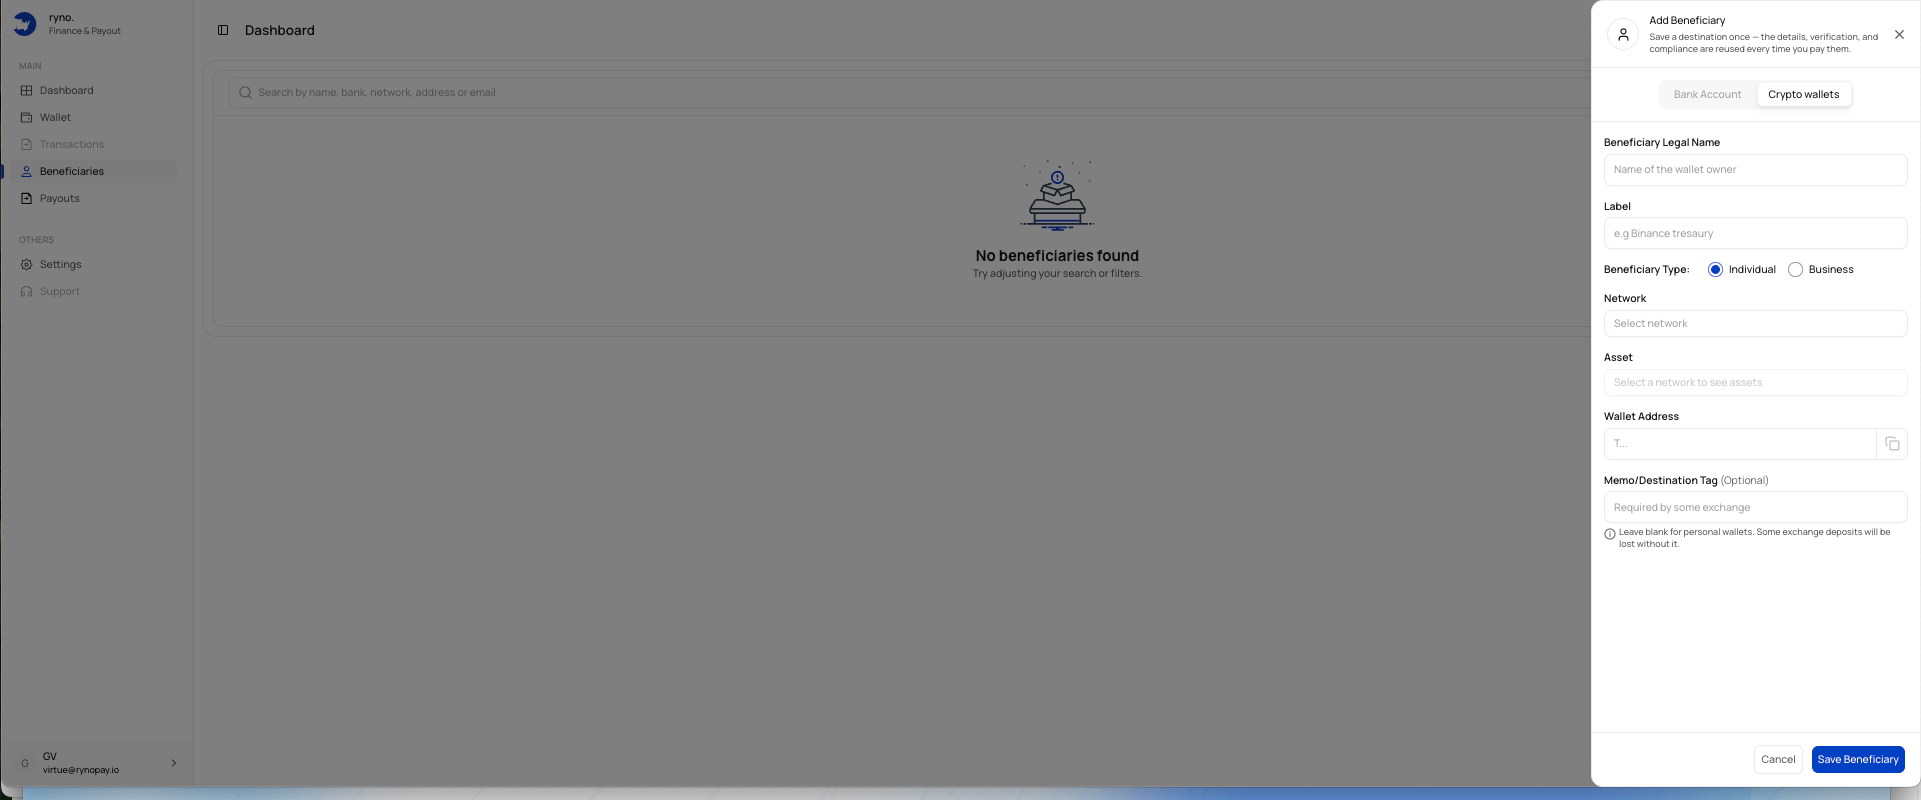
A crypto beneficiary is a saved wallet destination that can be selected during a crypto payout.
 ## Crypto beneficiary fields
| Field | Description |
| ---------------------- | ------------------------------------------------------------- |
| Beneficiary Legal Name | Legal name of the wallet owner. |
| Label | A memorable name for the saved wallet. |
| Beneficiary Type | Individual or Business. |
| Network | Blockchain network used by the wallet. |
| Asset | Digital asset to be sent. |
| Wallet Address | Destination wallet address. |
| Memo/Destination Tag | Additional identifier required by some exchanges or networks. |
## Add a crypto beneficiary
Open the Add Beneficiary panel and choose **Crypto wallets**.
Provide the wallet owner's full legal name.
Use a clear name that helps you recognise the destination.
Choose **Individual** or **Business**.
Choose the blockchain network used by the destination wallet.
Select the supported asset for the chosen network.
Paste the destination address carefully.
Add it where the destination requires one.
Review all details and select **Save Beneficiary**.
A transaction sent to the wrong network, address, asset, memo, or destination tag may be irreversible.
## Memo or destination tag
Some exchanges use a shared wallet address and require an additional memo or tag to identify the recipient.
Leave this field blank only when the destination does not require one.
The form notes that some exchange deposits may be lost when a required memo or destination tag is omitted.
## Address verification
Before saving:
* Confirm the network
* Confirm the selected asset
* Compare the first and last characters of the address
* Confirm whether a memo or tag is required
* Consider sending a small test payout where appropriate
## Related guides
## Crypto beneficiary fields
| Field | Description |
| ---------------------- | ------------------------------------------------------------- |
| Beneficiary Legal Name | Legal name of the wallet owner. |
| Label | A memorable name for the saved wallet. |
| Beneficiary Type | Individual or Business. |
| Network | Blockchain network used by the wallet. |
| Asset | Digital asset to be sent. |
| Wallet Address | Destination wallet address. |
| Memo/Destination Tag | Additional identifier required by some exchanges or networks. |
## Add a crypto beneficiary
Open the Add Beneficiary panel and choose **Crypto wallets**.
Provide the wallet owner's full legal name.
Use a clear name that helps you recognise the destination.
Choose **Individual** or **Business**.
Choose the blockchain network used by the destination wallet.
Select the supported asset for the chosen network.
Paste the destination address carefully.
Add it where the destination requires one.
Review all details and select **Save Beneficiary**.
A transaction sent to the wrong network, address, asset, memo, or destination tag may be irreversible.
## Memo or destination tag
Some exchanges use a shared wallet address and require an additional memo or tag to identify the recipient.
Leave this field blank only when the destination does not require one.
The form notes that some exchange deposits may be lost when a required memo or destination tag is omitted.
## Address verification
Before saving:
* Confirm the network
* Confirm the selected asset
* Compare the first and last characters of the address
* Confirm whether a memo or tag is required
* Consider sending a small test payout where appropriate
## Related guides