

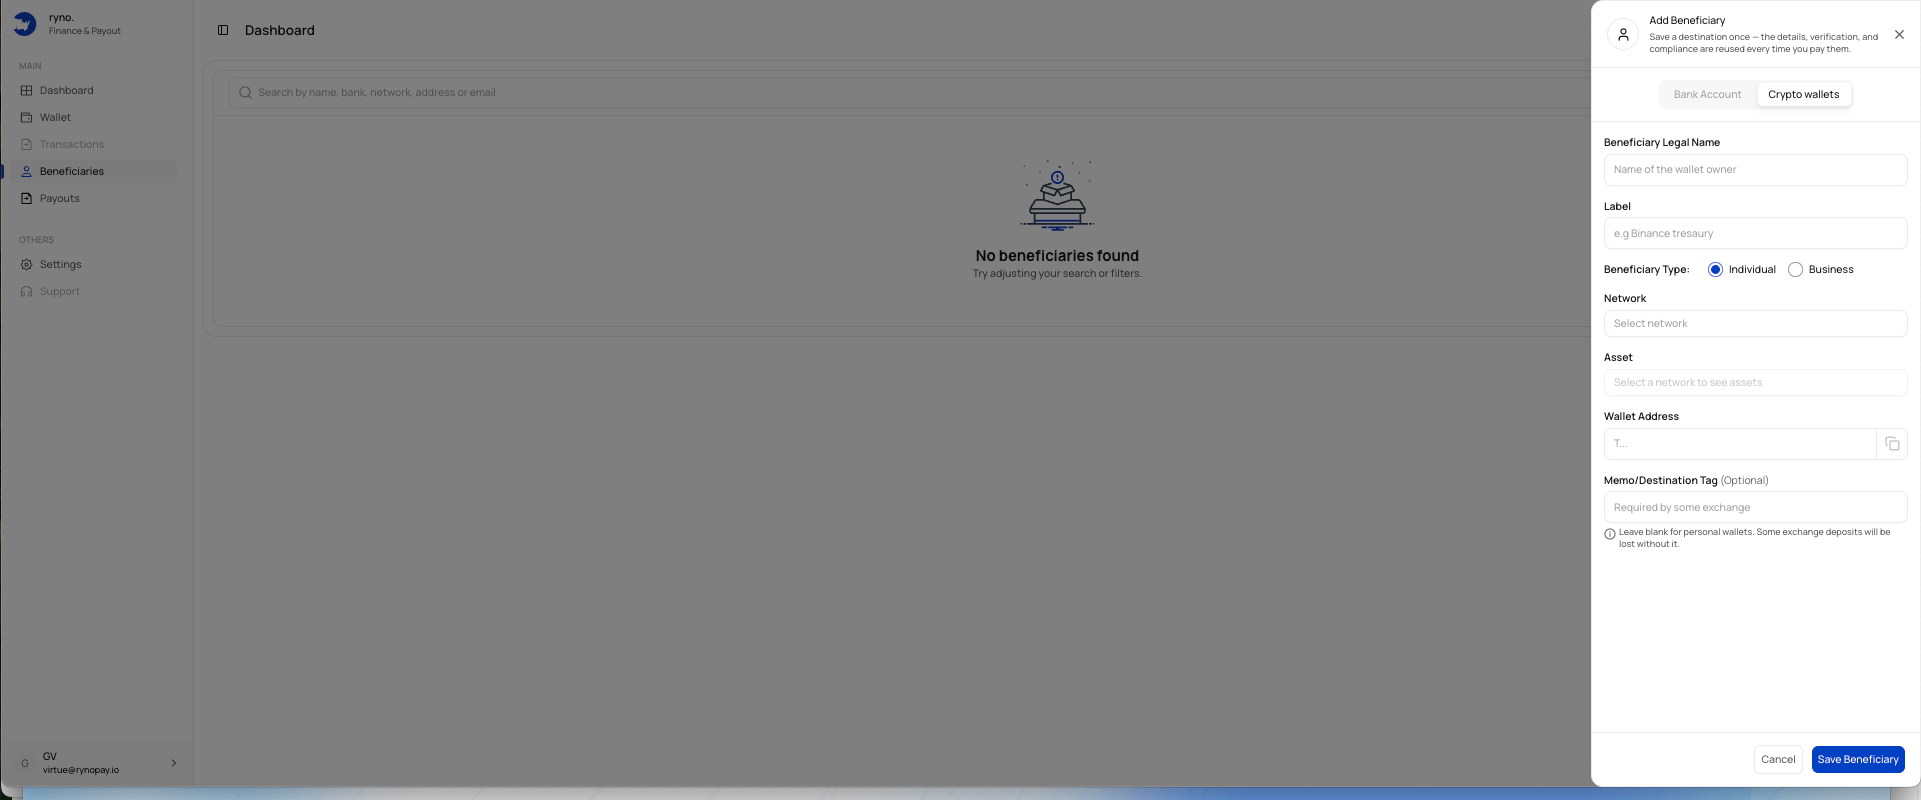
Crypto beneficiary fields
Add a crypto beneficiary
1
Select Crypto wallets
Open the Add Beneficiary panel and choose Crypto wallets.
2
Enter the legal name
Provide the wallet owner’s full legal name.
3
Add a label
Use a clear name that helps you recognise the destination.
4
Select beneficiary type
Choose Individual or Business.
5
Select the network
Choose the blockchain network used by the destination wallet.
6
Select the asset
Select the supported asset for the chosen network.
7
Enter the wallet address
Paste the destination address carefully.
8
Enter a memo or destination tag
Add it where the destination requires one.
9
Save the beneficiary
Review all details and select Save Beneficiary.
Memo or destination tag
Some exchanges use a shared wallet address and require an additional memo or tag to identify the recipient. Leave this field blank only when the destination does not require one.The form notes that some exchange deposits may be lost when a required memo or destination tag is omitted.
Address verification
Before saving:- Confirm the network
- Confirm the selected asset
- Compare the first and last characters of the address
- Confirm whether a memo or tag is required
- Consider sending a small test payout where appropriate